Delicious chocolate biscuit cake: recipe with photo. Chocolate biscuit - a dessert with a delicate cocoa flavor
Chocolate biscuit is a completely independent product: it has a presentable appearance both as a whole and in a section. Tall, porous, with a soft copper tint, impeccable in taste. Sprinkle with a handful of powdered sugar and serve! And the best basis for a complex cake is not worth looking for. Ordinary biscuits are kept for a day before cutting into cakes for better maturation. This one is ready to be impregnated without delay. Change the butter cream to sour cream, custard, protein, coat with citrus or berry curd, collect in a pile, cover with crumbs, coconut flakes, decorate with fruits, marzipan figurines and serve to the table in half an hour.
Prep time: 60 minutes / Serves: 8 / 22 cm tin
Ingredients
- wheat flour 100 g
- eggs 4 pcs.
- sugar 150 g
- dark chocolate 100 g
- butter 100 g
- baking powder 10 g
- salt 2 g

How to make chocolate biscuit
We carry out several processes in parallel - we immediately stock up on bowls, they will need 5 pcs. Arrange the separated egg whites and yolks in two bowls. We take out the eggs (large) in advance from the refrigerator and keep at room temperature for about an hour.

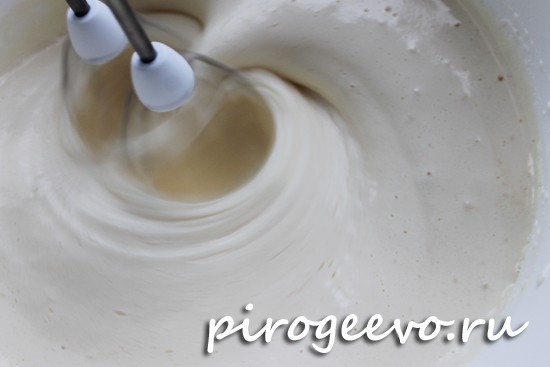
Beat the whites with a mixer for about 3-4 minutes - it all depends on the power of your unit. We stop when we reach airy and steady peaks. In the third container, we heat a bar of black (!) Chocolate in a water bath or in a microwave oven. Let me remind you that chocolate with a high percentage of cocoa beans is important - this time do not take cocoa powder, even very good one. In another bowl, we grind soft, pliable butter and granulated sugar - we work with a fork or whisk, you can use a combine to knead the dough.

Having combined sugar with butter to crumbs, pour viscous warm chocolate, continue to knead and bring the composition to a uniform color.

We return to the yolks - add one egg yolk to the chocolate and already sweet butter. Stir thoroughly each time until smooth.

In the last plate, mix a bit of salt to enhance the taste, sifted wheat flour and only the highest grade, as well as a portion of baking powder. If you wish to add vanilla flavor, toss in a teaspoon of vanilla sugar at this stage. We introduce dry ingredients in two or three doses - at first the chocolate dough will become quite paid and the spoon / whisk / spatula will turn with difficulty.

Finally, we shift the protein foam in parts. Like the yolks, stir each time until completely combined. At the last stage of kneading, the dough with chocolate is noticeably moistened and turns from thick into a fluffy, stretchy, creamy one.

For convenience and for the sake of the ideal side of the future product, we lay a heat-resistant form with a diameter of 22 cm with sheets of baking paper. We do not lubricate with any fat. We fill with sticky dough - level the surface and send it to a preheated oven. We bake a homemade chocolate biscuit for about 30 minutes at a temperature of 180 degrees. Do not open the door for the first 20 minutes - the biscuit cake will fall off or swell unevenly!

After half an hour, we check the crumb, puncturing with a long torch. If there are no wet clots, take it out. Many cooks cool biscuits without removing them from the dishes, turning them upside down and setting them at a certain height above the countertop. I have another way. Right in the form, in the initial position, we throw it on the table (we spread a towel for a soft landing) from a height of about 50 cm. You can do it a couple of times. We shake the high and porous cake, do not allow it to shrink. Then we take it out, cool it down. Carefully tear off the parchment from the cold biscuit, turn it upside down.

Loose, with a bright aroma of chocolate, the biscuit is beautiful and tasty on its own - we powder it a little or choose a complex decor. See what sweets are on hand. Jam, condensed milk, ice cream, nuts and fresh berries are suitable here.


If there is already a reason, we build a full-fledged cake. We cut it into three cakes, grease with sweet and sour impregnation, a delicate cream, decorate it impromptu. Happy tea!

Today I immediately selected 4 best recipes for making lush, tall, soft and fragrant homemade biscuits - classic (vanilla), poppy, chocolate and very beautiful biscuit - “red velvet” (in the photo below - just a cake with such a biscuit).
Tell me, dear reader, how do you feel about biscuits? Good? How are they for you? If mutual love and agreement with this fastidious type of pastry baking reigns in your kitchen, I can only be happy for you!
I didn’t have a relationship with him from the very beginning ... Sometimes there were successful attempts, but they were so rare that they weren’t worth mentioning ... Most often, instead of a tall, lush classic biscuit, I got something obscure and unconvincing ... Of course, any bad luck can be abundantly soaked with delicious cream, decorated better, and the cake will be joyfully destroyed by hungry guests and homemade ones, simply because homemade cake is ALWAYS tastier than store-bought. Maybe no one will even notice your jambs, but the sediment will remain ...
But a biscuit is the basis for delicious cakes and pastries, how can you cook them poorly?
Popular beginner mistakes when making homemade classic biscuit.
Having shoveled a dozen recipes and videos from experienced housewives who make lush biscuits "on the count of times", I made several important conclusions - how to cook a biscuit without mistakes. I'll be happy to share with you!
So the errors are:
- We cook from products of different temperatures - it turns out that it is important to "balance in temperature" all the products that will be used
- We do not follow the recipe - we take fewer eggs or put more flour, we take the products “by eye”, and do not weigh them ...
- My typical mistake, as it turned out, is that I never sift flour! It turns out that this is very important for getting a magnificent biscuit - it is better to sift the flour not even once, but several times, so we saturate it with oxygen.
- Beating eggs together is a mistake, although I have seen such recipes. Still, according to the classics, you need to separate the whites from the yolks and beat them separately, with a clean whisk, without mixing
- Baking dish not prepared. I always cook the pan the right way - oil the bottom and sides, sprinkle with a little flour, or line with parchment for baking, so this mistake is not about me ...
- Oven temperature: an error if you put a biscuit in an unheated oven. And a mistake, if you open the oven door before 20 minutes have passed from the start of baking - the dough may settle and no longer rise!
With this in mind, we will proceed to our wonderful biscuits.
Classic biscuit with vanilla

Let's start, of course, with the classics. Anyone who wants to can cook a fluffy, soft and fragrant classic sponge cake of 4 eggs - it is important to do everything according to the recipe, following the steps and measuring the components for the biscuit dough strictly according to the recipe.
- Flour 120 gr.
- Sugar 175 gr.
- Egg 4 pcs.
- Vanillin 1 sachet

- First of all, we will separate the yolks from the proteins, I hope you know how to carry out this simple procedure. We break the egg with one blow so that the shell cracks almost to the middle. Over the bowl, carefully break the two halves and drain the protein, throwing the yolk from one half of the shell to the other. You can simply pour the whole egg (whole, make sure that the yolk does not spread!) into a bowl and gently pick it up with a large spoon and put it in another bowl.
- It is believed that in no case should the yolk get into the protein bowl, even in a small amount, otherwise, they say, the proteins will not whip into a strong foam ... I don’t know for sure whether this is true, but I always try to break eggs over a separate bowl, and not over the general one, so that in which case, not to spoil all the proteins at once ...

- As already mentioned - the flour must be sifted without fail, and even - several times. This will give our biscuit extra splendor.

- We begin to beat the whites in a bowl at medium speed, gradually adding sugar in small portions. Whites are also whipped by hand, it just takes longer. And yet - it is advisable to take fresh eggs, and not old ones - they beat better.

- We stop whipping when a thick foam appears, so thick that if we turn the bowl upside down, our protein mass will not fall out anywhere, but will remain in the bowl! They also say "beat until stable peaks." This, you must understand, is such frozen cones that form on the beater, if you take it out of the bowl - our protein foam will stand like a stake on this very beater. From such a good foam you can bake meringue!

- Now put the oven on preheat - about 180-190 degrees.
- In the whites with sugar already whipped to the desired consistency, add 4 yolks - one at a time, continuing to beat.

- Now we will remove the whisk (or mixer) and arm ourselves with a spatula - we will gently and gently mix our mass with it, slowly adding flour and vanillin to it. Even in the photo you can see what an airy dough we got! This means that the biscuit will be lush and tall, the main thing is not to mess it up when baking.

- Lubricate the form and sprinkle with flour, if required for this form. Her sides should be high - the biscuit will greatly increase in height! If there is no high, cook from 2 parts on two different forms, but at the same time. Since this type of dough must be baked immediately after cooking, so as not to settle.

- We put in the oven for 25-30 minutes at 185 degrees.

- Leave the hot biscuit in the form until it cools completely. If necessary, cut a little from the sides with a sharp knife so that the biscuit is better separated from the walls.
- We did not use any baking powder for the dough, and the dough rose by almost 5 cm - an excellent result! A cake of this height can even be cut into 3 parts, and not into two, as usual.
- But first he needs to be allowed to settle. Wrap it in cling film and refrigerate for at least 12 hours.

Such a properly infused biscuit will be easy to cut, almost meringue crumbs. This is what it looks like on a cut. Great result, right? 
Very spectacular and beautiful biscuit - "Red Velvet"

For this unusual cake, we will have to use food coloring. I don’t really like this kind of additives, but I really liked the look of this biscuit - I have never seen anything like it! In my environment, too, no one ate such a cake, so those who like to surprise and like to treat with something original can use this recipe. Moreover, I will show everything step by step, with a photo, as it should be 🙂

What products are needed:
- 110 gr. butter
- 110 gr. corn oil (other is possible, the main thing is odorless)
- 340 gr. flour
- 10 gr. cocoa
- 350 gr. Sahara
- 2 eggs (100 gr.)
- 230 gr. milk or kefir
- 7 gr. baking powder
- Red food coloring - we select the amount by color, if the dye is in the form of a gel, then no more than 10 gr.
This type of biscuit has not only a bright unusual bright color (and looks very impressive in any cakes), but also a bright pleasant taste.
Step by step work plan:
- Cut butter at room temperature into pieces and begin to mix with powdered sugar. Here we also add another type of oil - vegetable refined (so that there is no smell), you can corn.

- 2. Beat until airy. Due to the addition of vegetable oil, the mass turns out to be a little watery, but still the butter will give the necessary splendor. We begin to add eggs (pre-beat them with a fork) - pour in a thin stream into the bowl, continuing to beat.

- 3. Now mix all the dry ingredients and sift them through a sieve. Flour, baking powder and alkalized cocoa powder. This type of cocoa powder has a rich chocolate flavor. But if you have a different type of cocoa powder - just increase its volume by 10-15 grams, and flour - on the contrary, reduce by the same amount.

- 4. Now is the time to put the oven on preheat - 150 degrees.

- 5. Now, continuing to beat the bulk, we alternately introduce milk and a dry mixture with flour. At the same stage, add the dye - if it is dry, you can dilute it in milk, or you can add it to the dry mixture.

- 6. In the photo - added dye in the form of a gel. It also needs to be added "by eye", adding in parts and tracking the color of the dough, but not more than 10 grams of gel.

- 7. The color should turn out to be about this saturation. The only thing to keep in mind is that when baking in the oven, the color will become less saturated than in raw dough.

- 8. It is better not to bake this volume of dough in one form - it may not bake well due to the characteristics of the dough. It is best to distribute the entire volume into 3 forms (diameter 21 cm). But keep in mind that you will have to bake them at the same time so that the dough does not fall off. If this does not work out, for example, you have only one form, then it is better to knead each portion of the dough again before baking.
- 9. We set to bake for about 30-35 minutes at a temperature of 150 degrees. The readiness of the biscuit is easy to check with a dry wooden stick (or match) - if we pierce

10. We have 3 lush cakes - cut each in half and get 6 cakes. We will use one of them for sprinkling, so we break it into pieces and send it to dry additionally in the oven at 110 degrees for an hour.

11. Any butter cream goes well with this biscuit. Here's a beauty you can do -

Lush and fragrant biscuit with poppy seeds

Poppy biscuit has many cooking options. Sometimes it can turn out to be somewhat “heavy” ... But this recipe for poppy seed biscuit is chosen so that its structure is very tender and soft, while it is quite saturated with poppy seeds, which always gives the dough a unique taste and aroma. For this, in fact, he is so loved by many.
I also adore poppy seeds, since childhood, when my mother cooked a gorgeous poppy seed roll for the holidays. And by the way, we grew poppies ourselves in the garden, and it was very large, incredibly tasty in any pastry!
But I digress, let's continue. For this poppy seed biscuit recipe, we need the following:
products:
- 90 gr. flour
- 50 gr. dry poppy
- 120 gr. Sahara
- 4 eggs (200 gr.)
- 20 gr. milk
- 2 gr. baking powder
- 20 gr. corn oil
- 30 gr. cornstarch

- First, grind the poppy seeds in a blender so that it fully reveals its aroma and taste in baking. Many people advise pre-rinsing the poppy well in cold water and drying it completely before adding it to the biscuit dough (if the poppy seeds are wet, the biscuit may not rise). But I usually remember these recommendations already being "in the process" and therefore almost always just take a poppy from the package.

- Sift the flour several times through a sieve and mix with crushed poppy seeds.

- Don't forget to preheat the oven to 160 degrees.

- Eggs should be at room temperature so they beat easier. Start beating at medium speed and add a pinch of salt.

- Continuing to beat, add sugar in small portions. When half the sugar has already been added, increase the whipping speed and add the remaining sugar in one portion. Beat until our egg mass becomes airy and increases in volume by almost three times.

- In a tightly beaten egg mass in two or three additions, add a mixture of flour and poppy seeds. But we already stir everything very carefully, with a spatula, in manual mode, so as not to disturb the splendor and lightness of the mass and, ultimately, get an airy dough and a magnificent biscuit.

- Mix milk with vegetable oil and add to the dough. Also gently mix with a spatula from the bottom up.

- We shift the dough into a high form, level the surface. You can additionally slightly twist the form so that it is filled denser and more evenly.

We bake for 35-40 minutes at a temperature of 160 degrees. Check readiness with a wooden skewer - if dry, the biscuit is ready. Turn the form over and leave to cool in this form. Look what a beautiful, tall and soft biscuit we got. The height of this cake is 6.5 cm. If you do not smear it right away, then you need to wrap the biscuit in a film and put it in the refrigerator. 
Chocolate biscuit with natural chocolate
The biscuit according to this recipe turns out to be "very chocolate", fantastically tasty! To be honest, it was a surprise for me that not ordinary cocoa powder, but real chocolate, from a melted chocolate bar, can be added to the chocolate cake dough. Apparently, this explains such a distinct taste of chocolate. Probably, for everyone's favorite legendary cake "Prague", just such a biscuit will give the best result.

For the chocolate biscuit, take:
- 100 gr. flour
- 100 gr. butter
- 100 gr. Sahara
- 4 eggs
- 100 gr. chocolate (preferably bitter, with a high cocoa content)
- 20 gr. vanilla sugar
- 10 gr. baking powder

Step by step recipe for chocolate biscuit
- First things first, put the oven on preheat - 180 degrees.
 2. Sift the flour together with the baking powder.

3. Mix room temperature butter with vanilla sugar until smooth. 
4. Separate the yolks from the proteins. 
5. Break the chocolate bar into pieces and place in a container over boiling water - in a water bath. Then cool the chocolate to about 28 degrees (when the mass is still liquid) and add to the butter. Knead. 
6. Add the yolks one by one to the chocolate mass, constantly mixing thoroughly. 
7. Whip the whites to persistent "peaks", into a thick, dense foam. 
8. Combine the flour and chocolate mass - in several steps, mixing thoroughly each time. 
9. Add the protein mass - in parts, constantly stirring the dough. The dough is airy. 
10. Immediately lay out in the prepared form, align. For some reason, I often meet questions (more precisely, requests) “how to make a high chocolate biscuit with a diameter of 28 cm so that it is not flat.” 28 cm is a very large mold diameter, you need to take a lot of eggs and other ingredients for such a dough, and there is a high probability that the dough will not rise ... There are two options here. The first is to make 2 or 4 low cakes, each time making a new dough batch just before baking (because biscuit dough containing a lot of liquid can give sediment to the bottom layer and therefore bake poorly in large volumes). The second option is to bake biscuit single-layer rectangular cakes on a sheet (4 pcs.), And then cut them with a cutter knife into a shape with a diameter of 28 cm. You can already assemble a high chocolate cake of large diameter from them. 
11. Send to the oven for 30 minutes at 180 degrees. 
12. Here we have such a chocolate “handsome biscuit”! 
And how fragrant it is, it magically smells of chocolate, probably, this is the smell that reigns in Willy Wonka's chocolate factory 🙂

Making the right chocolate biscuit at home is not so easy. It is important in preparing the dough to take food at room temperature or warm. So grains of sugar, salt will dissolve faster. The dough will be better. With step-by-step recipes, you can make chocolate biscuits for the cake yourself. It remains to choose the filling and cream for dessert. And now you are already an advanced confectioner. Cook delicious cakes at home. Surprise your family and friends with amazing treats.
The classic egg white biscuit is very fluffy. After baking and cooling, wrap the biscuit with cling film. Leave for 6-8 hours at room temperature. Then unfold and cut into pieces horizontally. Unusually tender cake layers will turn out.
Ingredients
For the recipe, take a chocolate bar with a cocoa content of 70-82%. For lovers of a rich chocolate taste, we suggest taking a bitter chocolate bar 99%. More in the list of ingredients:
- 100 gr. wheat flour;
- 1 tsp baking powder;
- 1-2 pinches of drinking soda;
- 100 gr. margarine (or butter);
- 2 pinches of vanillin (or 1 tsp vanilla sugar);
- 100-120 gr. dark chocolate;
- 4 selected eggs.
Step by step cooking
The test will not take long. Therefore, immediately turn on the oven to warm up to 180˚C. Chocolate sponge cake recipe step by step:
- Combine flour with baking powder. Sprinkle a pinch of soda. It is desirable to sift the mass.
- Combine soft margarine with vanilla.
- Separate the egg whites from the yolks. Put them in different bowls.
- Melt the chocolate in a steam bath. Mix with fat mass. Add yolks. Mix thoroughly with a spatula. Pour the flour into the chocolate mixture in several passes. Mix until the dough is homogeneous.
- Beat the whites with a mixer at medium speed. Gradually add sugar. Then turn up the speed. Beat until stable smooth foam. Pour the foam into the dough. Stir from bottom to top.
- Grease a round baking dish with a piece of margarine. Lay out all the dough. The biscuit should be baked at 180˚C in the oven. It will take 30-35 minutes.
Has the baking time passed? Check the readiness of the crumb. Pierce with a wooden skewer. If the skewer is dry, you're done. Leave the chocolate biscuit in the mold until it starts to cool. Go around the edge with a silicone knife. Pull out. Leave to cool at normal temperature on a wire rack.
Recipe with cocoa
Chocolate biscuit recipes are simplified by using cocoa. No need to melt chocolate or whip egg whites. Just mix the ingredients with cocoa. The perfect dough is ready.
Biscuit Ingredients
The most delicious biscuit is obtained from the minimum composition of products:
- 4 selected eggs;
- 3 art. l. cocoa powder;
- 160 gr. Sahara;
- 200 gr. flour of the highest grade;
- 0.5 tsp fine salt;
- 1 tsp baking powder.
How to cook
Before cooking, turn on the oven at 180-190˚С. Grease an oven dish with oil. So, how to make a chocolate biscuit:
- Break the eggs into a bowl. Turn the mixer on the first speed. It is better to use a stand mixer with a removable bowl. So your hands will be free.
- Sprinkle sugar over the eggs. Then salt, cocoa. At the end flour, baking powder. Make sure the mass is well mixed.
- Put the dough into the form.
- Bake in the oven. After 30 minutes, check the readiness of the crumb. If the center is still raw, bake some more. Enough 8-12 minutes.
This is a quick recipe. Do you have guests in a hurry? Use the step by step guide. By the time the guests arrive, there will be a delicious biscuit on the table. It remains to pour the delicacy with jam and a quick cake is ready.
In a multicooker with chocolate
How to cook a chocolate biscuit in a slow cooker? Almost the same as in the oven. Knead the dough. To cook, select the program "Baking" for 60 minutes. After baking, leave the biscuit in the switched off multicooker for 15 minutes. Only then pull it out.

Proportions of ingredients
For the chocolate biscuit, take the following ingredients:
- 160 gr. flour;
- 180 gr. margarine (you can butter);
- 2.5-3 tbsp. l. cocoa powder;
- 70 gr. chocolates;
- 3 eggs;
- 2 tbsp. l. sour cream;
- 180 gr. Sahara;
- 0.5 tsp soda;
- the same amount of baking powder;
- some salt.
Sequencing
It will take no more than 4-5 minutes to knead the dough. The rest of the time is baking. A detailed description of how to make a chocolate biscuit in a slow cooker:
- Combine dry ingredients in one cup. These are flour (necessarily of the highest grade), cocoa, soda, salt, ripper. Sift from lumps, excess impurities.
- Build a steam bath. Melt the chocolate and margarine mixture. Do not overheat the chocolate, otherwise the mass will curdle.
- Separately beat eggs with sour cream and sugar. Use regular or brown sugar. With cane sugar, the crumb of the pie will turn out cloyingly sweet.
- Mix sweet eggs with chocolate ganache. Pour in the dry mixture. Mix until a homogeneous dough is obtained.
- Lubricate the multicooker bowl with grease. Lay out the dough. Close the lid tightly. Cook in baking mode for 60 minutes.
Did you like the recipe?
YesNot
on boiling water
It differs in a special way of kneading the dough. The mass is, as it were, brewed with boiling water. For the filling, take pieces of milk chocolate. The result is a biscuit with chocolate inside.

Required Ingredients and Proportions
Prepare the following foods:
- 120 gr. milk chocolate;
- 300 gr. flour;
- 3 eggs;
- 120 ml of boiling water;
- 200 ml of milk;
- 1 st. l. wine vinegar;
- 100 gr. margarine;
- 350 gr. Sahara;
- 20 gr. baking ripper;
- 1 tsp salt.

Expert opinion
Anastasia Titova
Confectioner
Do you want to replace the chocolate bar with cocoa powder? Take 10% of the weight of the eggs. For 3 cocoa eggs you will need 10-15 grams.
Work algorithm
Repeat the preparation steps. You will have the perfect chocolate biscuit cake. Recipe:
- Combine eggs, milk, soft margarine, sugar, salt in one bowl. Mix with a whisk.
- Add flour. Stir.
- Pour in hot water. Mix again until a homogeneous preparation is obtained. Add the ripper-vinegar mixture. Stir.
- Grind the chocolate through a coarse grater or break into pieces. Add to dough. Stir.
- Divide the dough evenly into 2 molds. Bake at 190˚C in the oven. Anastasia Titova
Confectioner
Cut each pie into 2 layers. You will get 4 cake layers for a magnificent cake. Layer the cakes with confiture, grease with cream. Put the dessert together.
On kefir
A classic kefir biscuit that always turns out airy and delicious. This cake is impossible to mess up. Just 2 recipe steps to combine the ingredients. The oven will do the rest.
Product set
For a delicious biscuit, take the following products:
- 2 small eggs;
- 2 tbsp. l. freeze-dried coffee;
- 1 tsp baking powder;
- 160 gr. flour;
- 80 ml of sunflower oil;
- 140 ml of kefir;
- 160 gr. Sahara;
- on the tip of a knife of salt.
Cooking process
To prepare chocolate dough, follow the instructions:
- Whisk eggs with sugar and coffee. Pour in kefir, oil. Stir.
- Add salt, flour, baking powder. Mix until a lump-free consistency. Anastasia Titova
Confectioner
Freeze-dried coffee, if desired, replace 80 ml of freshly brewed Turkish coffee or 6 tablespoons of cocoa. You will get the most chocolate biscuit. Put the finished dough into the form. Select the diameter of the form from 18 to 22 cm. Bake in the oven at 180-190˚C for 35-40 minutes.
Chocolate Chiffon Biscuit
Chocolate biscuit is called chiffon because of its consistency. The crumb of such a pie is tender, slightly moist. This is a culinary classic. You don't need any special equipment for cooking. Everything is fast and simple. Easy to make at home.
To bake a chiffon biscuit, you need to take
- 1 st. Sahara;
- 2 tbsp. flour (a glass of 250 ml);
- 1 st. warm milk;
- 2 eggs;
- 120 ml of sunflower oil;
- a large pinch of salt;
- the same amount of vanilla;
- 1.5 tsp drinking soda;
- the same amount of baking powder;
- 6 art. l. cocoa powder;
- 50 ml sour cream.
The process of kneading dough and baking
- A simple recipe for chocolate biscuit starts with dough. In a bowl, combine sugar, vanilla and eggs. Add oil, milk. Add salt, sour cream. Whisk with a hand whisk until smooth.
- Sift flour, baking soda, cocoa, baking powder directly into a bowl. Stir.
- Pour in 250 ml of boiling water. Gradually stir into the dough.
- Cover the form for the semi-finished product with thin paper. Lubricate with oil. Lay out the dough. Level the top. In the form of 18 cm, the cake turns out to be high - 6-7 cm.
- In a preheated oven (180˚С), send the semi-finished product for 35 minutes. Does your oven have a top-bottom heating function? Turn it on. Baking will go faster. Anastasia Titova
Confectioner
A light cake will be the basis for a chic biscuit cake. Layer the cakes with cream, decorate with fruits and berries. A chocolate biscuit cake will delight guests at any family holiday. Enjoy your meal.
The basic requirements for a chocolate biscuit remain the same as for the most ordinary biscuit: it must keep its shape, be fluffy and airy, not crumble and be easily cut into the required number of pieces for soaking with syrup and filling with filling. For recipes for chocolate biscuits, a variety of types of tiles are used, or ordinary cocoa powder.
How to make plain and chocolate biscuits at home
Biscuit is often referred to as "confectionery bread". Not only before making a chocolate biscuit at home, but also for making the most ordinary biscuit, you need to thoroughly study the proportions of the ingredients and strictly follow the order in which they are added.
The proportions are very simple - for a round shape with a diameter of 22–24 cm, we take 4 eggs (eggs of the 1st category are considered 50 g each), 120 g of sugar and 120 g of flour. It should be understood that the density of flour is less than sugar, and we are talking about mass, not volume. If it is more convenient for you to measure the volume, then 120 g of sugar is half a standard glass (250 ml), and 120 g of flour is a full glass.
There is a risk of "killing the proteins" - so that they can begin to delaminate. When whipping, pause and check the degree of desired foam strength
Bookmark order: the yolks are separated from the proteins and beaten with the addition of half the measured sugar. There is a small detail here: it is better to remove the shell from the yolks before whipping (the film that retains their shape). If the film does not work out, just gently pick it up with a fork and remove it so that the yolk spreads freely, then you can pass the yolks through a sieve. Removing this film will reduce the omelet flavor of the future biscuit. The yolks are beaten until a snow-white foam and sugar dissolves. After that, you can proceed to whipping the proteins. They are beaten until a stable foam (and until the volume increases by 2-3 times), after which the remaining portion of sugar is added to them and beaten to firm peaks. For the stability of whipped proteins, a pinch of salt or a drop of lemon juice is sometimes added to them (as an option, they smear the sides of the dishes with lemon before starting to whip) - in principle, these tricks are optional, with a good mixer, the proteins are whipped to firm peaks and without any tricks. But for flavor, you can add a drop of almond essence or powdered sugar with a vanilla pod aged in it to the proteins: there is such a way to store vanilla and at the same time flavor powdered sugar, you just need to put a whole pod in a jar, completely cover it with powder and keep the jar tightly closed . All additives are allowed already in tightly whipped proteins. Half of the proteins are sent to the yolks, stirred, then flour is introduced there, and here it is not necessary to beat, it is necessary to stir thoroughly and quickly and carefully introduce the remaining proteins. Pour the dough into a mold and immediately send it to bake in a preheated oven (up to 200 degrees) for 20-25 minutes until a confident golden crust and before testing with a wooden skewer: a wooden toothpick or skewer is stuck into the finished biscuit and immediately removed if the skewer comes out dry, then the dough is baked enough, if we see sticky pieces of dough, then it needs more time.
There are options for baking biscuits in the microwave. It does not need to be preheated (and it will not work), the dough in the form (glass, ceramic or silicone) is sent to a power of 600–700 watts for 7–8 minutes. In addition to saving time, we get the effect of a “white biscuit” - without a baked golden crust, which would still have to be cut off if we plan to use this biscuit to create a cake.
The finished hot biscuit must be removed from the oven, but allowed to cool in the form - about 20 minutes, then removed from the form and allowed to cool completely. Do not immediately soak it with syrups or lubricate with cream. The biscuit must not only cool down, but also ripen - dry. Ideally, the finished biscuit cake should be kept for 10-12 hours (night) or left to dry for a day. So he will definitely lose the omelet flavor, and, in addition, the dried biscuit is much easier to soak evenly with syrup.
Based on the finished biscuit, you can make cakes by cutting the biscuit into squares, soaking it in syrup and decorating with cream. You can make the Potato cake: grind the dried biscuit with a blender or in a meat grinder, mix it with butter cream, form balls and roll them in cocoa powder or chocolate chips.
You can make cakes - cut along the cake and soak it with syrup, or build a two-tiered cake from two cakes of different diameters.
If you want to make a biscuit roll, then you need to bake it not in shape, but by pouring the dough onto a sheet of baking paper, which is lined with a baking sheet, and bake a little less time so that it remains soft.
For biscuit crumbs, a biscuit can also be baked on a sheet, but until fully cooked.

There is a “biscuit for the lazy” - this is the well-known apple charlotte.
And how to make a chocolate biscuit at home so that it turns out lush and does not crumble? To prepare a chocolate biscuit at home, as required by the rules of culinary excellence, you can do the following:
- replace part of the flour with cocoa powder;
- add grated chocolate to the dough before putting it into the mold;
- when whipping the yolks, add melted chocolate to them (it should not be hot; in principle, natural chocolate melts already at a temperature of 34-36 degrees), while also reducing the amount of flour.
Flour can also be partially replaced with nut flour (almond or walnut resin blender).
Biscuit recipe with nuts and dark chocolate
Biscuit with dark chocolate and almonds

Ingredients:
For a sponge cake with chocolate and nuts, you will need 200 g of butter or margarine, 150 g of powdered sugar, 200 g of peeled ground almonds, 5 egg whites, 140 g of flour, 50 g of powdered sugar for whipping proteins into foam, currant jam.
Chocolate fondant: 5 egg yolks, 150 g powdered sugar, 100 g.
Cooking:
Grind butter or margarine with sugar into foam, add almonds, beaten together with sugar into thick foam, egg whites, flour. Stir the mass lightly. Put the dough on a greased and floured baking sheet, put in a preheated oven and bake over low heat. Cool the finished product, grease with jam, glaze with chocolate fondant. When it hardens, cut the biscuit into rectangular pieces.
Chocolate fondant: Grind egg yolks with sugar, add softened dark chocolate to the mass and stir again.
A biscuit with bitter chocolate prepared according to this recipe should be left to soak for several hours.
How to make delicious Chocolate Hazelnut Cake
And how to cook a chocolate biscuit with the addition of cocoa powder?
Chocolate biscuit with cocoa and nut filling

Ingredients:
50 g butter or margarine, 200 g powdered sugar, 2 eggs, 100 g crushed nuts, 200 g flour (preferably premium), a pinch of baking soda, 250 ml milk, 20 g cocoa powder.
Filling: 150 g powdered sugar, 150 g butter, 50 g crushed nuts, 1 tbsp. l. lemon juice.
Lemon lipstick: 120 g powdered sugar, juice of 1/2 lemon, 1 tbsp. l. water at room temperature.
Cooking:
Before making such a chocolate biscuit, butter or margarine, sugar and eggs must be thoroughly mixed, add nuts, flour along with baking soda, milk, cocoa powder and stir. Put the dough in an even layer on a greased and floured baking sheet and place in a preheated oven, bake over low heat. Cool the finished delicious chocolate biscuit, cut it in half, grease with the filling, connect the halves, glaze the biscuit with lemon fondant on top. When it hardens, cut the product into rectangular pieces. Filling: grind sugar with butter until foam forms, add nuts, lemon juice to the mass and stir. Lemon fondant: Beat sugar, lemon juice and water until thick.
Chocolate and coffee biscuit

Ingredients:
6 eggs, 150 g powdered sugar, 140 g crushed nuts, 1 tbsp. l. ground natural coffee.
Filling: 3 eggs, 180 g powdered sugar, 2 tsp. cocoa powder, 180 g butter, 20 g powdered sugar.
Cooking:
Before preparing a chocolate biscuit, five egg yolks, an egg, sugar must be ground until foam is obtained, add nuts, ground coffee, thick foam whipped from egg whites, grated crackers, mix slightly. Put the dough on a greased and floured baking sheet and bake in a moderately warm oven. Cool the finished biscuit, cut in half, put the filling, connect, let stand, then cut into rectangular pieces. Filling: combine the eggs with sugar, cook, stirring constantly, until thickened, then, removing from the heat, knead the cocoa. Separately grind the butter together with powdered sugar (20 g) and add this mixture to the already prepared chilled egg mass.
Chocolate biscuit with nuts

Ingredients:
4 eggs, 200 g of granulated sugar, 1 tbsp. l. water, 50 g nuts, 200 g flour (highest grade), a pinch of baking soda, 20 g cocoa powder.
Filling: 250 ml milk, 20 g flour, 1 egg yolk, 30 g vanilla sugar, 200 g butter, 200 g powdered sugar.
Fondant from cocoa for glazing: 100 g butter or margarine, 40 g cocoa powder, 100 g powdered sugar.
Cooking:
Before making a chocolate biscuit, beat the egg whites into a thick foam, add sugar, water, egg yolks and beat again until thick, add flour along with baking soda, cocoa, chopped nuts. Put the dough on a greased and floured baking sheet and bake in a preheated oven over low heat. Cool the finished biscuit, grease with the filling and glaze with cocoa fondant, which should harden.
As you can see in the photo, the chocolate biscuit needs to be cut into rectangular pieces:

Stuffing: stir flour, egg yolk, vanilla sugar in milk, cook the mixture until thickened, cool, stirring constantly. Grind the butter with sugar and gradually add to the chilled mass. Cocoa lipstick: in melted butter (or margarine), add cocoa sifted through a sieve, sugar, stir the mass until it thickens.
How to make chocolate chip cookies with apples and lemon at home
Here you will learn how to bake a chocolate sponge cake with apples and lemon juice fudge.
Chocolate sponge cake with apples

Ingredients:
For the recipe for this chocolate biscuit, you will need 450 g of flour, 8 eggs, 30 g of wheat flour, 550 g of sugar, 600 ml of cream, 1 kg of apples, 30 g of butter, 1 tbsp. l. cocoa, 1 tbsp. l. raisins, vanillin to taste, powdered sugar
Cooking:
Separate the yolks from the proteins, put the proteins in the refrigerator, grind the yolks with sugar until white in a lush mass. Beat the remaining proteins until a thick foam forms. Pour flour into a separate bowl, add pounded yolks and whipped whites, add cocoa, stir everything (from top to bottom). Put the resulting biscuit mass into a mold, greased with butter and sprinkled with wheat flour. Smooth out and place in oven over medium heat. Bake a biscuit in the oven for 1 hour. Sprinkle the berries with powdered sugar and refrigerate. Cut the biscuit horizontally, soak with berry juice, pour berries and raisins on top. Decorate a chocolate sponge cake with apples whipped with sugar and vanilla cream.
Chocolate biscuit squares glazed with lemon fondant

Ingredients:
Butter - 180 g, powdered sugar - 1 cup, eggs - 4 pcs., chocolate - 180 g, flour - 1 cup; for lemon fondant: powdered sugar - 1.5 cups, hot water - 2 tbsp. spoons, fresh lemon juice - 2 tbsp. spoons, vegetable oil - 1 teaspoon.
Cooking:
Before preparing a delicious chocolate biscuit, butter or margarine, sugar, egg yolks, mix thoroughly, then add a thick protein foam whipped from egg whites, combine with flour. Stir the mass lightly. Put the finished dough on a greased and floured baking sheet, put in a preheated oven and bake over low heat. Glaze the finished product with lemon fondant and, when the lipstick hardens, cut the biscuit into squares.
Making lemon curd: mix sugar, hot water, lemon juice, vegetable oil until a thick, shiny mass is obtained.
How to make chocolate biscuit with cherries: recipe
Chocolate sponge cake with cherry

Ingredients:
Baking soda - ½ teaspoon, lemon juice - ½ teaspoon, medium-sized eggs - 5 pcs., high-fat sour cream - 250 g, beet sugar - 270 g, cocoa powder (natural chocolate can be used) - 5 tbsp. tablespoons, wheat flour - 260 g, frozen or fresh cherries - 2/3 cup, vegetable oil - 10 ml, vanillin - 5 g.
Cooking:
For this chocolate cherry sponge cake recipe, the egg yolks are carefully separated from the whites and laid out in different dishes. Sugar is added to the first ingredient, and then it is thoroughly ground using a large spoon. As soon as the egg mass becomes lush and whitened, sour cream of high fat content is spread to it and mixed well. As for the proteins, they are whipped into a strong foam. To do this, you can use a hand whisk, or you can use a blender.
Having carried out the described actions, the egg masses are combined. Next, baking soda is added to them, which is first quenched with lemon juice. Cocoa, vanillin and wheat flour are also poured into the base. All components are thoroughly mixed until a homogeneous and airy dough is obtained. Some cooks use a mixer for this purpose.
Preparing berries for the pie
Cherry biscuit can be prepared with frozen or fresh berries. To do this, it is sorted out from the garbage, washed thoroughly and all the bones are taken out. If the cherry was frozen, then it must first be thawed.
Product Formation Process

What should I bake a biscuit with cherries in? The recipe involves the use of a heat-resistant form with sides of 6-8 cm. It is preheated in the oven and then greased with oil (vegetable). After that, all the biscuit dough is laid out in the prepared dishes. It is desirable to carry out this process immediately after its kneading. If you keep the base aside for more than 5-10 minutes, the cake will not rise properly and will turn out sticky.
As soon as the dough is in shape, pitted cherries are alternately laid out in it. This can be done randomly. It should be noted that the berries will sink a little into the base. This is quite normal.
Cooking the pie in the oven
How should you bake a cherry biscuit? After the form is filled, it is sent to the oven. To make the cake as fluffy as possible, the kitchen cabinet should be preheated to 180 degrees. Bake the dessert at the indicated temperature for 45 minutes. During this time, the dough should be completely cooked and rise well.
Cream preparation

Cream for such a cake can be used differently, but sour cream filler is the best fit. To prepare it, the dairy product is strongly whipped with a blender, gradually adding sugar to it. At the output, a rather lush white mass is obtained, which is immediately used for its intended purpose. After baking a chocolate sponge cake with cherries, it is removed from the mold and completely cooled for two hours.
Boiled chocolate biscuit in a slow cooker and oven: recipes with photos
Chocolate biscuit on boiling water in a slow cooker

Ingredients:
- 2 cups of flour,
- 2 cups sugar
- 2 eggs,
- 1.5 tsp soda,
- 6 art. spoons,
- 1 glass of milk
- 70 ml vegetable oil,
- 1 glass of boiling water.
Cooking:
For this recipe for chocolate biscuit on boiling water in a slow cooker, you need to beat eggs with sugar, add vegetable oil and milk, mix everything thoroughly. Whisk the flour, baking soda and cocoa in a separate bowl, then fold into the batter bit by bit. At the very end, pour in boiling water and mix again. The dough is very liquid.
To prepare a chocolate biscuit in boiling water according to this recipe, you need to grease the slow cooker with butter and immediately pour the dough into the bowl. Turn on the "Baking" mode for 1 hour, then, without opening the lid, set the "Heating" mode for 20 minutes (you can use the "Baking" mode for all 80 minutes - it depends on the type of multicooker and how it bakes).
Chocolate biscuit with almonds

Ingredients:
6 eggs, 180 g of powdered sugar, 5 ml of vegetable oil, 30 g of vanilla sugar, 50 g of crushed almonds, 250 g of flour (preferably of the highest grade), 15 g of baking soda.
Filling: 200 g butter, 1 tbsp. l. milk, 30 g cocoa powder, 150 g powdered sugar, 50 g almonds, a little rum.
Pomade: 200 g powdered sugar, 30 g vanilla sugar, 1 tsp. vegetable oil, 2 tbsp. l. boiling water, 1 tsp. cocoa powder.
Cooking:
With a mixer, beat the eggs together with powdered sugar, vanilla sugar and vegetable oil until thick (about 7 minutes). Then add almonds, flour along with baking soda to the mixture and beat again. Put the dough on a greased and floured baking sheet and bake in the oven. Cool the finished biscuit, cut into two parts, spread with filling, connect, glaze with lipstick on top. Filling: with a mixer, beat the butter, boiled in cocoa milk, sugar until foam is obtained, then add the crushed almonds, rum to the mass and beat the mixture again. Lipstick: beat with a mixer a mixture of powdered sugar, vanilla sugar, vegetable oil, water (boiling water), cocoa powder until thick.
Look at the photo for boiling water chocolate biscuit recipes - such products turn out to be very magnificent:

How to make a banana and dark chocolate biscuit: step by step recipes with photos
Check out the step-by-step recipe and photo of a biscuit with chocolate and banana filling.
Biscuit with chocolate filling and bananas

Ingredients:
40 g butter or margarine, 150 g powdered sugar, 30 g vanilla sugar, 4 eggs, 20 g, 80 g grated crackers, 130 g flour (preferably premium), a pinch of baking soda.
Filling: 200 ml milk, 30 g flour, 100 g butter, 100 g powdered sugar, 30 g dark chocolate, 3 bananas.
Whipped cream: 250 ml cream (for whipping), 20 g powdered sugar.
Cooking:
To prepare a sponge cake on dark chocolate, butter or margarine, sugar, vanilla powder and egg yolks need to be whipped into foam. Then add grated chocolate, thick protein foam, grated crackers, flour mixed with baking soda. Stir the mass lightly, put on a greased and floured baking sheet and put in a preheated oven, bake over low heat. Cool the finished product and cut into three layers, spread with stuffing and put on top of each other. From above and from the edges of the biscuit also grease the filling and decorate with peeled bananas and whipped cream.
Filling for biscuit with banana and chocolate: stir flour in milk and cook until thickened, then cool and add, stirring constantly, butter, grated chocolate, bananas cut into slices.
Whipped cream: chilled cream (for whipping - 35% fat content) beat together with sugar until a thick foam is obtained.
Here you can see a photo of a biscuit with chocolate according to the recipe presented above:

How to make delicious chocolate biscuits at home
Chocolate biscuit with banana

This biscuit is very large, so sometimes I cook half the recipe. You can choose any cream. If desired, you can also use classic sour cream.
Ingredients:
For test:
- Flour - 3 tbsp.
- Sugar - 2 tbsp.
- Soda - 1.5 tsp
- Vinegar - 1 tbsp.
- Cocoa powder - 4 tbsp.
- Eggs - 2 pcs.
- Milk - 1 tbsp.
- Refined sunflower oil - 1/3 tbsp.
- Boiling water - 1 tbsp.
For cream:
- Butter - 200 g
- Cottage cheese (preferably liquid) - 300 g
- Sugar - 1 tbsp.
- Banana - 1 pc.
- Lemon juice - 1 tbsp.
For glaze:
- Sour cream - 3 tbsp.
- Sugar - 2 tbsp.
- Cocoa - 2 tablespoons
1. Mix all dry foods.
2. Beat the eggs with a mixer. Add oil and continue beating.
3. Add soda quenched with vinegar and continue whisking.
4. Alternating, add milk and dry mixture in several steps. Whisking thoroughly each time.
5. Pour a glass of strong boiling water into the resulting thick dough and beat again until a homogeneous consistency is obtained.
6. Pour into a large mold and bake for 25–30 minutes at a temperature of 1800C. Let cool.
7. For the cream, soften the butter. And grind it with sugar.
8. Grind banana in a blender. Sprinkle with lemon juice.
9. Add cottage cheese to the oil mass (if it is not liquid, it is better to grind it in a blender beforehand) and a banana. To stir thoroughly.
10. Cut the cooled biscuit across into 2-3-4 parts (as it will) and coat with cream.
As you can see in the photo, for this chocolate biscuit recipe, you need to prepare the icing. To do this, combine sour cream with sugar and cocoa in a saucepan and heat, stirring constantly, until the sugar is completely dissolved. Cover the biscuit with frosting.

Biscuit with milk chocolate
Biscuit "Chocolate" with milk chocolate

Ingredients:
For test: 150 g of premium wheat flour, 200 g of butter, 8 eggs, 200 g of sugar, 1 teaspoon of vanilla sugar, 1 teaspoon of chopped nutmeg, 30 g of starch.
For chocolate filling: 200 g of grated milk chocolate, 1 tablespoon of crushed bitter almond kernels, 5 egg whites, 100 g of powdered sugar, 1 tablespoon of rum, 1 teaspoon of butter.
For glaze: 50 g sugar, 20 ml lemon juice, 1 tablespoon red wine.
For decoration: 50 g chopped almond kernels, 1 tablespoon chopped walnut kernels.
Cooking method:
To prepare the dough, separate the yolks from the whites, beat the whites, and grind the yolks with sugar. Mix softened butter with mashed yolks, then beat with a mixer, add vanilla sugar, proteins, nutmeg, mix everything thoroughly, then add a mixture of flour and starch, beat again with a mixer.
Put the dough into a mold, set the “Baking only” mode, set the timer for 25–30 minutes. Cool the finished biscuit, cut lengthwise into 3 parts.
To prepare the chocolate filling, mix grated chocolate with egg whites and powdered sugar, put in a water bath.
Stirring, bring to a boil, then put in a buttered form, put in the oven, preheated to 120 ° C, for 10 minutes. Then cool the filling, add nuts, rum to it and layer the biscuit cakes.
To prepare the glaze, mix sugar with lemon juice. Grind, pour in the wine, mix everything thoroughly.
Ready-made biscuit with the addition of chocolate icing and decorate with nuts.
Biscuit with chocolate "Budapest"

Ingredients:
8 eggs, 80 g of powdered sugar, 20 g of cocoa powder, 100 g of crushed almonds, 60 g of powdered sugar for whipping protein foam, 100 g of flour (preferably of the highest grade), 50 g of chocolate, 40 g of butter.
Filling: 180 g butter, 120 g powdered sugar, 100 ml milk, 100 g milk chocolate, 1 tbsp. l. Roma.
Cooking:
Grind egg yolks together with sugar until foam is obtained, add cocoa, roasted crushed almonds and mix. Beat a thick foam from egg whites, knead sugar into it, then add grated chocolate, melted warm butter, flour and yolk mass, mix lightly. Put the dough on a greased and floured baking sheet and bake in a moderately warm oven. Cool the finished product, cut into three identical layers, grease with the filling and connect. Top the biscuit with a filling of melted chocolate and whipped cream. Filling: put chopped chocolate into milk and cook until thickened, cool, add butter pounded with sugar and mix. Then rum should be added to the filling for the milk chocolate biscuit.
Biscuit with melted white chocolate inside: recipes with photos
Biscuit with white chocolate

Ingredients:
For a biscuit with melted white chocolate, you will need flour - 400 g, egg - 5 pcs., Sugar - 100 g, butter - 100 g, white chocolate - 200 g, baking powder - 2 teaspoons, zest - 2 oranges.
Cooking:
Wash the oranges well and pour over with boiling water, dry. Grate the zest on a fine grater. Cut the butter into pieces, break the chocolate, combine and melt in a water bath or microwave oven, mix and cool. Using a mixer, beat eggs with sugar into a lush, increased mass, add melted chocolate and butter. Gradually add the sifted flour and baking powder. Add orange zest, mix gently. The dough will have the consistency of thick sour cream. Cover the baking dish with parchment, grease the sides with oil, spread the dough evenly. Place in an oven preheated to 180 C. Bake 20-30 minutes until done. Check the white chocolate biscuit prepared according to this recipe with a wooden stick. Cool the finished biscuit with chocolate inside and remove from the mold. Cut to desired shape.
Butter cake with white chocolate

Ingredients:
- Flour - 1.5 cups
- Eggs - 3 pcs.,
- Butter - 100 g,
- Baking powder - 1 sachet,
- Vanillin - 1 sachet,
- White chocolate - 1 bar,
- Sugar - 1 cup.
Cooking:
To make a chocolate biscuit, you need to beat the eggs into a bowl. Beat them into a fluffy foam with a mixer or whisk. Then add sugar. Stir again until the sugar is completely dissolved. Break white chocolate into pieces. Put it in a bowl. Stirring, melt in a water bath. Melt the butter in a separate bowl. Cool chocolate and butter to room temperature. Then pour it into the egg mixture. Stir.
To make the biscuit fragrant, add a bag of vanillin or vanilla sugar. Pour in the baking powder for the dough. Mix the mass again. Add flour sifted through a sieve. Mix the biscuit dough well. Its consistency is quite liquid and resembles dough for pancakes and fritters. Grease the sides and bottom of the mold with a piece of butter or sunflower oil. Pour the batter into an even layer.
Like other types of biscuit dough, this biscuit should only be baked in a hot oven. The oven temperature should be 180-190C. Bake 30 minutes. During baking, do not open the oven door so that it does not settle. Check readiness with a toothpick or match.
Here you can see photos for homemade white chocolate biscuit recipes:


Easy Chocolate Strawberry Cake Recipe
Chocolate biscuit with strawberries

Ingredients:
To prepare a chocolate biscuit according to this simple recipe, you will need 5 eggs, 150 g of powdered sugar, 20 g of cocoa powder, 150 g of flour (preferably of the highest grade), strawberries.
Protein foam: 4 egg whites, 80 g granulated sugar, 30 g vanilla sugar, 4 tbsp. l. water.
Cooking:
Beat the eggs with sugar with a wooden spatula or a metal whisk until thick, then add, stirring constantly, the sifted cocoa powder and flour. Grease a baking sheet with oil, sprinkle with flour and put the dough on it, put in a preheated oven. Without bringing the biscuit to readiness, remove the baking sheet from the oven, put the washed strawberries (remove the pedicels from it), decorate with protein foam on top, put back in the oven and bake until cooked. Cool the finished biscuit and cut into rectangular pieces.
Protein foam for chocolate biscuit with strawberries: pour granulated sugar together with vanilla powder with water, put on fire and cook a thick syrup. Beat the egg whites into a thick foam, pour in, stirring constantly, hot syrup. Mix the mixture thoroughly.
How to cook chocolate biscuit in a slow cooker
Chocolate biscuit in a slow cooker

Ingredients:
- 1 glass of milk
- 1 cup of sugar,
- 100 ml vegetable oil,
- 4 tbsp. l. cocoa,
- 1.5 cups flour
- 3 eggs,
- 1 st. l. baking powder, salt.
Cooking:
Beat eggs with sugar with a mixer in a lush mass, then add vegetable oil and milk there, mix gently. Then, in turn, stir in the flour, baking powder and cocoa powder, but not with a mixer, but with a spoon or fork to keep the splendor of the dough. Lubricate the slow cooker with oil, lay out the dough and cook in the “Baking” mode for 80 minutes. Turning the chocolate biscuit in a slow cooker is not necessary.
The video "Chocolate Biscuit" will help you better understand the technology for making such pastries:
Boiling water in this biscuit works real miracles: the cake is lush, porous, moist, and the taste is rich chocolate! For a long time I did not dare to cook this biscuit because of the name (for some reason, I was repulsed by the fact that the biscuit was not in butter or at least kefir, but in boiling water!). But after reading the ingredients, I realized that I was deeply mistaken. How much delicious is here, in addition to boiling water: vegetable oil gives moisture to the cakes, and cocoa - a unique chocolate taste. In general, the recipe did not disappoint me, I am happy to share my find with you. Let this biscuit be an occasion to create the most delicious cakes and the coziest tea parties in the world!
Ingredients:
- Flour - 2.5 cups
- Sugar - 1.5-2 cups (adjust sweetness to your taste)
- Soda - 1 tsp (you do not need to extinguish the soda in the recipe)
- Cocoa powder - 2 tbsp. l. with a slide +150 ml of hot water for brewing
- Baking powder - 1 sachet (10 g)
- Eggs - 2 pcs.
- Milk - 150 ml
- Unscented vegetable oil - 1/3 cup
- Boiling water - 150 ml
- Salt -1/3 teaspoon

How to cook a biscuit "Chocolate on boiling water"
The biscuit dough is kneaded very quickly, so immediately turn on the oven to warm up to 170 C.
Sift through a fine sieve cocoa powder (2 tablespoons with a slide) to get rid of lumps. You don’t need to throw anything away: just rub large lumps with a spoon over a sieve, they will be easily sieved. Now pour cocoa with hot water in such a way that it is convenient to stir into a homogeneous gruel. I need about 150 ml of hot water for this. Stir cocoa with water and set aside to cool to room temperature.
This method of brewing cocoa allows you to activate it, the taste of the biscuit becomes richer and more chocolatey. Since I learned about this tricky trick, I use it in all recipes containing cocoa in the ingredients. And I, my family, really like the result. In addition, the consumption of cocoa in the recipe is reduced by half. For example, in this recipe you can use 4 tbsp. tablespoons of cocoa, sifting it along with flour, or do as I did, brewing only 2 tbsp. spoons of cocoa in hot water. The result will be similar, the amount of powder during brewing is less and the taste is more intense.

What cocoa powder to use? Ideally, which is sold in online baking stores. Such a product is much tastier than usual, it has a rich chocolate flavor and a darker, sometimes even reddish color. It also mixes much more easily with liquids because the alkalinization process reduces its acidity.
If you don't have alkalized cocoa on hand, use whatever good quality cocoa powder you have available.)
The next step in the preparation of the biscuit will be sifting the flour (2.5 cups with a volume of 250 g). This is necessary to saturate it with air and in order to break up the lumps.

Add baking soda (1 tsp), salt (1/3 tsp), baking powder (1 sachet 10 grams) to the flour.

We take a hand whisk in our hands and mix all the dry ingredients so that the baking powder and soda are evenly mixed into the flour. If you follow this rule, the biscuit will rise evenly, without slides and mounds on the surface.

Break 2 eggs into a separate bowl (I use C1, these are medium-sized eggs). Pour granulated sugar (1.5 cups with a volume of 250 g) and start beating with a mixer until a thick, light and fluffy mass is obtained.
Attention! If your mixer is weak (or you use a blender with a whisk), it is better to add sugar not immediately with the eggs, but after the eggs are beaten into a fluffy foam. And in this case, you need to add in small portions so that the sugar has time to interfere with the egg mass.

Beat for about 8-10 minutes until a light dough is obtained.

The whisks should leave a noticeable mark on the surface of the egg-sugar mass, this is a sign of readiness for the next steps.
Add the cooled cocoa to the egg-sugar mixture. We mix.

Now it remains to add vegetable oil (1/3 cup). I use unflavoured refined sunflower oil, corn oil is also great (it has absolutely no taste/aroma at all).

Mix at a low speed of the mixer and then pour in the milk (150 ml)
Attention! All ingredients, including milk, should be at room temperature. If the milk is from the refrigerator, warm it up, but not to a hot state, but to a pleasant one (it can be a little hotter than room temperature).

Again, at a low speed of the mixer, combine the ingredients until smooth (do not beat anything for a long time, as soon as the milk has interfered, stop working with the mixer).
Now add the dry ingredients and stir again with a mixer at the lowest speed (you can stir with a spatula or spoon).

It turns out a homogeneous dough without lumps, rich chocolate color and pleasant aroma.
The whole kneading process took place under artificial light, so the color of the dough gives off a little yellowness, but I will definitely show you the final color of the finished biscuits and their structure in daylight.

Boiling water (150 ml) is added last to the dough. To be more precise, the temperature of the water that I added was not 100 ° C, but a little less (75-80 ° C). Before starting kneading, I boiled the kettle, and by the time it was added to the dough, the temperature of the water in it, of course, was no longer 100 ° C, but a little less.
After adding boiling water, stir the dough and pour into molds.
Attention! The dough may seem too liquid to you. Rather, it is what it is - more liquid than in the usual, or.
Do not rush to add flour or somehow correct the structure of the dough. Remember that cocoa plays the role of flour in the dough, and despite the fact that we brewed it with boiling water, in the oven it will begin to “ally” with flour and together they will make our biscuit the way it should be. But if you can't resist and add flour, the cakes will become too dense.
I baked biscuits in two forms, both 18 cm in diameter, each biscuit turned out to be 4.5 cm high.
At the bottom of a detachable form put a sheet of parchment, cut out in the form of a circle. I did not grease the sides of the form with anything.

The dough pours very quickly (because it is watery), so be careful when dividing into two forms so as not to pour too much.

Tap each mold on the table to release excess air bubbles from the dough.
In a preheated (up to 170 C) oven, we send the forms for 25-35 minutes (baking time depends on the power of your oven). Do not open the oven for the first 20 minutes! Biscuit dough contains a lot of air, so it can settle from a sharp temperature drop.

Starting from 20 minutes, you can open the door a little to check and check the readiness. The surface of the biscuit should spring back: when pressed with the fingertips, return to its original position. Another test for readiness - a wooden stick stuck in the middle of the biscuit should come out dry, without sticky dough.

We take out the finished biscuits from the oven and let them stand in the form for 5-7 minutes. By this time, the cake usually moves away from the walls of the mold a little on its own. If this does not happen, you can use a sharp knife to walk around the circumference of the mold so that the biscuit quickly moves away from the walls and easily comes out of the mold.

Carefully remove the baking paper from the bottom of the biscuit and cool the cakes on a wire rack to room temperature. On the grate, the biscuit is well ventilated with air and cools evenly (there will be no wet bottom).
The cooled biscuits can be used immediately for making a cake or served with tea, but in order to make them even tastier, it is better to wrap each biscuit in cling film and put it in the refrigerator overnight. Here and below, all photos were taken in daylight =)

Chilled and rested biscuits are perfectly cut, do not break, keep their shape well. For cutting, you can use a special pastry thread or a knife-saw for bread.

The biscuit is porous and airy, like a sponge, rich in taste and color, slightly red. In its structure, it is very similar to, but unlike it, it holds its shape much better and crumbles less.

Not very liquid creams are perfect for “Chocolate on boiling water”. I made a cake based on these biscuits + + orange compote. It turned out very tasty!
Enjoy your meal!
Be sure to share your feedback on the recipe and photos of the finished biscuits, I am very pleased to receive feedback! When adding a photo to Instagram, please indicate the tag #pirogeevo or #pirogeevo so that I can find your photos on the web. Thank you!
In contact with